Synoptic Editor
Once inside the Synoptics module, you will access the Editor, the design environment where you will create your SCADA screens.
Creating a Synoptic
To add a new screen to your project:
- Go to the Synoptics tab in the side menu.
- Right-click on the folder "Synoptics".
- Select the "New Synoptic" option.

Editor Interface
The editor is designed to be intuitive and powerful. Its main parts are:
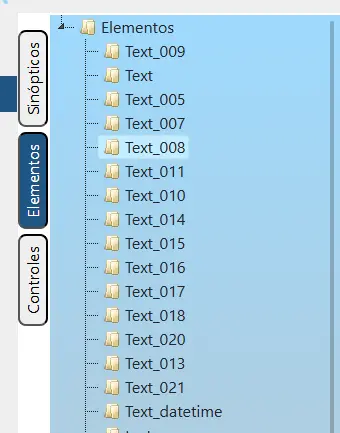
1. Left Side Menu
This panel organizes project resources into three tabs:
-
Synoptics List: The file explorer to manage your screens.
-
Elements: Graphic components that make up the current synoptic. Selecting one will automatically show its configuration in the Properties Panel, without needing to double-click.
-
Controls: List of components that can be added to the synoptic (buttons, selects, charts).
You can add elements by dragging them onto the synoptic as shown below:
Tip: You can also insert controls by right-clicking on an empty area of the synoptic and choosing the desired component within the
Insert itemmenu.
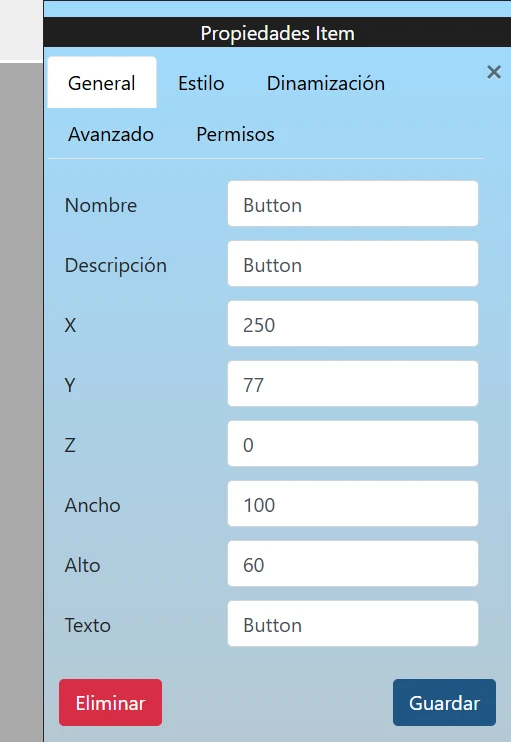
2. Properties
The properties panel (right) allows you to configure every aspect of the design. It is activated by:
- Double-clicking on an element (to edit its individual properties).
- Selecting "Synoptic Properties" from the background context menu (to edit the screen).
3. Tools
The top bar groups all the essential utilities for editing and viewing the synoptic:

- play_arrow Play Synoptic: Allows you to open the synoptic in Runtime mode to test its functionality.
- align_horizontal_left align_horizontal_right align_vertical_top align_vertical_bottom Alignment: Allows you to quickly align selected elements (left, right, top, and bottom). To use this tool, at least two elements must be selected, always using the position of the first selected element as a reference.
- align_vertical_center align_horizontal_center Centering: Aligns elements relative to the horizontal or vertical center. If multiple elements are selected, it uses the first element as a reference. If only one is selected, it will be centered relative to the synoptic (screen).
- height height Match Sizes: Allows multiple selected elements to share the same width or height, always using the dimensions of the first selected element as a reference.
- horizontal_distribute vertical_distribute Spacing: Defines a fixed separation distance (in pixels) between selected elements. It requires at least two elements, and the spacing is applied sequentially, placing each element at the specified distance from the previous one.
- grid_view Grid Distribution: Allows you to automatically organize a set of elements into a matrix or grid. To enable it, you must select a multiple of 4 elements (4, 8, 12, etc.) and have both horizontal and vertical spacing set to a value greater than 0 in the spacing fields.
- undo redo Undo / Redo: Allows you to go back through changes or recover them.
- Zoom: Slider to adjust the magnification level of the canvas. You can use shortcuts like
Ctrl+Mouse WheelorCtrl++/-for quick adjustments, andCtrl+0to reset it to 100%.
4. Options and Context Menu
The editor hides advanced functionalities through the context menu (right-click) and quick shortcuts that speed up the design process.
Synoptic Menu (Array)
Right-clicking on a synoptic in the side menu list opens management options:

- Properties: Opens the right side panel with the screen's general configuration.
- Close: Closes the current synoptic in the editor.
- Clone: Creates an exact copy of the selected synoptic to speed up the creation of similar screens.
- Delete: Permanently deletes the synoptic from the project.
Item Menu
Right-clicking on any element on the canvas displays a context menu with quick options:

- Insert item: Direct access to add new components without using the side panel.
- Copy: Saves the element to the clipboard. It is important to note that the clipboard is global to the editor, allowing you to copy elements from one synoptic and paste them into a different one, facilitating the reuse of designs across different screens.
- Delete: Deletes the selected element from the synoptic.